Pages

Showing posts with label DIY. Show all posts

Saturday, February 26, 2011

Don't (Card) Box Me In

A long, long time ago, (while my brain was far, far away?) I put together this monstrous-looking card box.


Baaaad. At the time, I didn't think a card box was necessary, but I didn't want loose cards to get lost or left behind, so I smashed this together monster-trucks style and called it a day.


I bought this oval box at Hobby Lobby and cut a hole for the cards, then wrapped it in some wrapping paper I found at Target.


I found this shoebox in the closet, and promptly destroyed it and tried to wrap it in leftover construction paper from my paper airplanes. Note the wrinkly ribbon that I didn't even pretend to iron first.

It was bad, ya'll don't even have to lie and tell me it's okay. I came back to it a couple weeks later and decided I didn't want to die of embarrassment at the wedding. The box was having a hard time sticking together (uhhh maybe that's because I tried to attach ribbon to construction paper with Scotch tape?), and basically just needed to be redone. So I started over. I tore off all the construction paper and sad ribbon, and wrapped it with what was left of the floral wrapping paper. I'm decent at wrapping gifts, so this alone made it look worlds better, but it wasn't quite done.

People needed to know what it's for. C-A-R-D-S. Cut, paste, done.


Voila! I suppose life would be easier if I just wouldn't half-ass projects in the first place, but what fun is that? :)

Have you had to redo any projects that didn't turn out right?

Monday, February 21, 2011

Centered, Once Again

What do you get when you cross tin cans, tea lights and faux flowers?


Rehearsal dinner centerpieces!

After several weeks of going back and forth (mason jars or glass vases? MASON JARS OR GLASS VASES?!?!) and sales on neither, our RD centerpiece idea kind of fell into my lap. I had headed to Michaels to round up the last of the pink peonies we would need to adorn the cake, when I went a-wandering past the dollar bins. Fate, I tell ya. I found these adorable swirly tin cans for a dollar apiece:


They had a little metal ring already set up on the inside to hold a tea light. Off in search of tea lights! I was hoping I wouldn't have to deal with real candles, but I knew how expensive LED tea lights could get, and let's face it, this was (another) zero-budget project. I figured it couldn't hurt to see what LED options Michaels had though, since I was already there and everything.

Believe when I say luck was on my side! Somehow I got a box of 20 flickering LED tea lights for $1.49!  Somebody mislabeled the shelf they were stocked on, down from its original $19.99. Win!


I know you can't really tell the size of the tin cans from the pictures, but they're kind of on the smaller side. Since we'll have one per table on the 10 picnic tables in the covered park pavilion where our rehearsal dinner will be, I didn't think this alone was quite enough. I don't want wimpy centerpieces! Back to the floral department!


Much better! Don't those colors look familiar? How lucky that Michaels had a bunch of the tin cans in varying shades of maroon-ish, pink-ish, and ... well, they only had one lime green, but I snagged it anyway. :) Who's counting?

As the sun fades, and the party continues into the evening ... the soft glow of the tea lights will emit from the swirls ... assuming the giant florescent lights in the pavilion don't drown it out.


Now, here's how I made this happen. Obvs, with the flowers on the top, it would be difficult to get to the tea lights to turn them on and off. So, when I cut the flowers to fit into the cans, I kept some of the greenery, and hot-glued the whole mess of foliage together into one piece. Now, before the rehearsal, we can just dump the flowers out, turn on the LEDs and put the flowers back in, and they'll look exactly the same. Done and done!

The only thing left before I wrap up this little project is the tablecloths to cover up the metal picnic tables. There will be a plethora of beer and barbecue on the tables (which I'm sure will not be messy at all), so I bought some cheap white plastic tablecloths from the dollar store to cover the tables.

Tell me about your rehearsal dinner! What are you doing for centerpieces? And most importantly, what food are you serving? ;)

Tuesday, February 1, 2011

Let It Grow!

So I'm a glutton for DIY punishment. At least I can admit it; the first toward recovery is admitting you have a problem, yes?


Sunday, December 12, 2010

It Must Be A Sign

Mr. Hyena's side of the guest list is MUCH larger than mine. We are getting married in a fairly small church. If we went with the traditional "Bride's Side, Groom's Side," my side would be ... sad-looking, and there wouldn't be room for everyone on his side. There won't be any ushers, and I like the idea of letting people sit wherever they want, but I didn't know how to convey that until I saw this sign:


Hmm. I could do something like that!

I had a couple 11x14 sheets of glass laying around (they came from some photo frames I bought, but the pictures I matted for them were too thick for the glass to fit back in), and was looking for a way to use them. I used the paint pen I bought for my hanger project and some silver spray paint I found at my parents' house. (Woohoo! This project was fuh-REE!)

Step 1: Get on the computer and type out your text in the font you want the sign to be in. Print it out.

Step 2: Tape your paper with the text to the underside of the glass. The glass should be on top of the words in the way you'd like them to be read.

Step 3: Use the paint pen to trace over the words through the glass. Two coats'll do it!


Step 4: I didn't like the blank space in between the two lines of text, so I drew a heart in between. <3

Step 5: When the text is complete and dry, flip the glass over. Spray paint the backside of the glass (the side without the text). Let it dry. You can do two coats, but I'm lazy and only did one, and it still looks good.


Step 6: Flip it over to reveal your signage masterpiece! (It looks better than this in real life, the glass makes it hard to take a picture of.) The part I love best? Because the paint is on both sides of the glass, automatic drop shadowww!

I plan to prop it up outside the sanctuary on one of those little photo stands.

Are you doing his-side, her-side seating?
Sunday, November 28, 2010

Tuesday, November 9, 2010

In which I am really proud of myself for being cheap

Okay, so I promised you a cost breakdown for my faux flower pretties. Let me preface by saying, I used several items for multiple floral projects, and I did not count those prices twice, unless it was something easy, like two rolls of ribbon or something (not confusing at all, eh!). Also, I am kind of math stupid and didn't keep the best track of breaking down receipts, so this is absolutely to the best of my ability, but it may still be slightly off. Now, let's get to it!


Bride's bouquet: $70.93 (includes flowers, floral tape, berry filler)

Bridesmaid bouquets (4): $75.48 (includes flowers, ribbon, pearl stickers) = $18.87 apiece

Corsages and Boutonnieres: $44.76 (includes flowers, berry filler, baby's breath) = approximately $3.20 apiece for 5 corsages and 9 boutonnieres

Centerpieces (8): $121.81 (includes floral foam, flower pots, flowers) = approximately $15.23 apiece

Altar Flowers (4): $49.68 (includes floral foam, stands, flower pots, flowers) = $12.42 apiece


TOTAL SPENT: $347.75

Oh boo. I realize if you add up the numbers I over-accounted by about $20 somewhere in there. Regardless, I know for a fact that I've only spent my final total. (It's likely that the cost comes out of the centerpieces and altar flowers.)

I also mentioned previously that Mom Hyena thought our altar decorations were too small, so we came up with a solution that requires no work on my part (yesssss). Mom Hyena went on her own search, and found these pre-made arrangements at one of the craft stores!


She offered to have two of them made for us, with the white gladiolas on the top and brighter pink hydrangeas than the ones pictured. We will use the original altar flowers to decorate the lobby outside the sanctuary, so they won't go to waste!

Anyway, to make a long story short ... I'm really proud of this. I think we ended up with some really cute real-flower alternatives, and I'm excited to display them at the wedding. I am also THRILLED by the cost savings, and the fact that I can continue to use these around the house after the wedding, or give them to guests if they want them.

What's your best money-saving tip?

Thursday, October 21, 2010

Invitations: Font Failure

Our invitations are in!!! And I'll do a little sneak peek soon ('cause I can't keep 'em secret for long!), but first I want to give a little insight into the design process, starting with the fonts.

I'm that girl who can look at a font on a sign and tell you what it is. But I took the lazy way out on our invitations. And I couldn't be happier!

Oh, imagine the horror: all the fonts in our invitation suite ... were already standard on my computer!

Let's put it this way: I could have spent hours upon hours browsing dafont.com or Fonts for Peas or 1000 Free Fonts. To be honest, that probably would have been fun, but I just didn't have the energy. I work in marketing, and most of the time, the standard fonts work fine for any project (Myriad Pro is EVERYWHERE, ya'll!). At my last job, my computer had 11,000 fonts on it, and I never had the time or energy to search through even HALF of those. Even with all those choices, we used the same five for almost every project. As much as I love fonts, I can't bring myself to go searching for them.

Regardless, I am very pleased with the way the invitations turned out. THRILLED, actually!

The fonts we used are:

If you're doing your own design work and don't have the time or patience to look online for fonts, there are a couple tricks you can do with your fonts in Photoshop to make them look cool.

First of all, play with variations on text. Just bolding, italicizing, condensing your font of choice can make it look totally different.

Second is the Swash tool, which I recently discovered! This works best with fonts that have "Pro" in the name.


In your character palette, click the drop-down menu on the far right (next to those double arrows that look like a fast-forward button).


Scroll down to OpenType, and select "Swash."


Now your text is fancy-fied!

This is just a subtle thing you can do to make your fonts look more unique. There are endless things you can do with fonts, even standard ones!

Are you designing your own invites? Do you have any cool text tricks?

(All fonts I've used are standard in Adobe Creative Suite 4, on a MacBook Pro running OSX Snow Leopard. I have no idea what fonts come standard on any other OS or version of Creative Suite.)

Saturday, September 18, 2010

Boutie-licious

I failed to find out what Mr. H was looking for in man-flowers until after I did my first round of flower shopping. When I finally did ask (er, bug him endlessly), he said he wanted a single white rose with baby's breath for the dudes. Okay, that shouldn't be too difficult in theory.

I found the perfect flowers for our corsages and boutonnieres at Hobby Lobby. I didn't have the first clue about how to put these suckers together, but a search on the 'Bee brought up a couple of tutorials, which I used as a jumping off point. I started with the bouts since they seemed less scary than the corsages. As I was working on these, I wondered how some brides can figure out how to do this with real flowers the day before their wedding without freaking out.

I gathered my supplies:


• Approx. 1-inch thick ribbon
• Artificial ivory roses, one per bout (save the leaves)
• Artificial baby's breath
• Artificial berries
• Hot glue gun
• Scissors
• Wire cutters
• Netflix movie to keep you entertained (it took me a long time to get the hang of this project)

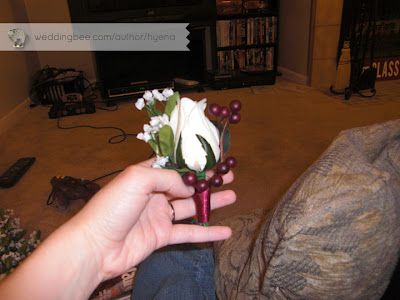
Step 1: Trim your rose to a more manageable size (stem should be about two or three inches so there is room to hot glue things to the stem).

Step 2: Cut a sprig of baby's breath and hot glue it to the side in an attractive manner.

Step 3: Repeat step 2, but with berries.

Steps 1-3

Step 4: Take the leftover leaves from the flowers. I only wanted to have one leaf, so those other two gotta go.


BAM!


Step 4 continued: Hot glue the leaf to the back of the boutonniere, still gluing directly onto the stem. I tried to hot glue the leaf right onto the flower, but that didn't want to stick. I'm still trying to figure out how to make it stand up the way I want it. H-Dad recommended epoxy?

Step 5: Now that everything is attached to the main stem, trim it down further so it's normal-boutonniere sized.

Step 6: Starting at the base, hot glue the end of the ribbon and attach to the stems, then wrap upward. Secure with more hot glue.


Step 7: Repeat steps 1-6 for each bout (we needed nine). Bask in the triumph of another completed floral project.


Hooray! I love them! They look so good! I am awesome!

Now I just need to figure out the corsages. I read somewhere that a corsage is just a bunch of boutonnieres stuck together, but that seems like it'd be awfully large. Also, I'm using ranunculus for the corsages, and those are somewhat big on their own. I sense an adventure!

Once I get the corsages completed, I think I'll be done with all our flowers, so I'll put together a cost breakdown for all our floral arrangements.

For those brides who are DIYing real flowers the day before the wedding — HOW are you doing it?! For real, I want to know!

Tuesday, September 14, 2010

Single Ladies

Of course I'm doing a bouquet toss. I've been made to stand up at every single wedding I've been to, even since I got engaged, and it's time for revenge! I want people to CRAWL FOR IT! :-D Hee hee.

I purchased some random pink and maroon flowers awhile back in an attempt to find something Mr. H would like for the groomsmen boutonnieres, and he didn't like any of them. I put them back in the Hobby Lobby bag and forgot about them, and I rediscovered them months later. I haven't decided whether or not I want to throw my actual bouquet for our bouquet toss, so I figured I could create a toss bouquet and decide later. :)

I started out by following Mom Hyena's technique for my real bouquet: arrange the stems the way you want them, and rubber band them together.


So much easier than last time! (Also, about 1/4 as many flowers...) Then, I trimmed the stems so they were all even, then wrapped the whole thing up in pink ribbon. It looked a little plain, so I spiraled some pilfered green ribbon around the pink, and hot glued it all together.


Heads up!

You know you love my "100% baaaaaaaaad" sheep pajamas. Hee hee.

I guess I've covered all my bases when it comes to the bouquets. Last time Hyena Sis came into town, I tossed it to her, and she said the end was a little sharp, so I'll trim the wire in the stems or stick something on it so I don't end up putting someone's eye out.

I haven't totally decided what music I'd like to play during the bouquet toss. I've always liked Beyonce's "Single Ladies," but I think it's a little overused. I'm considering using this song, even though it's kind of old:


What do you think? What song are you using for the bouquet toss?

Saturday, September 11, 2010

Hello, Cupcake!

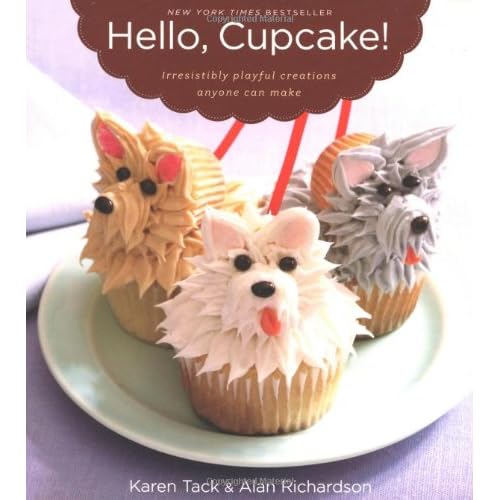
I've already talked about our cakes, but while wandering around Target with a friend one night, I stumbled upon these two books:


Ya'll, there are so many adorable cupcake decorating ideas in these books! I knew I had to share them. Also, there's step-by-step directions not only for the correct way to frost/decorate cupcakes, but for each idea. Awesome, because otherwise I would never be able to figure it out!

Anyone DIYing a cupcake tower? There were so many ideas in these books that I'd never even considered before in cupcake decorating. Check it out:


Do I spy a potential groom's (cup)cake?


So prettyyyy. I think everyone should make cute cupcakes. And send them to me. So I can eat them for breakfast right now. :)

Are you doing cupcakes instead of a cake? What will they look like?

Wednesday, August 25, 2010

There's Snow Pictures Like Our Pictures!

I'm not a huge fan of traditional guestbooks.  To me, it would feel like we're taking attendance. If we had a traditional guestbook, I would never look at it, which seems like such a shame.

On the other hand, I'm a huge fan of photo albums, so when I saw photo guestbooks in action, I was in love. The idea of getting our guests to write us little notes yearbook-style makes me really happy. I used our snowy engagement pictures and put them all in an album using Blurb, and I left white spaces on almost every page for writin'. I love the way our book turned out; the photo quality was good, the software was easy to work with and there were a lot of options for the book (hardcover or softcover? what colors? how thick do you want the pages?).

Ooooh:


Ahhhhhh:


Ohhhh!


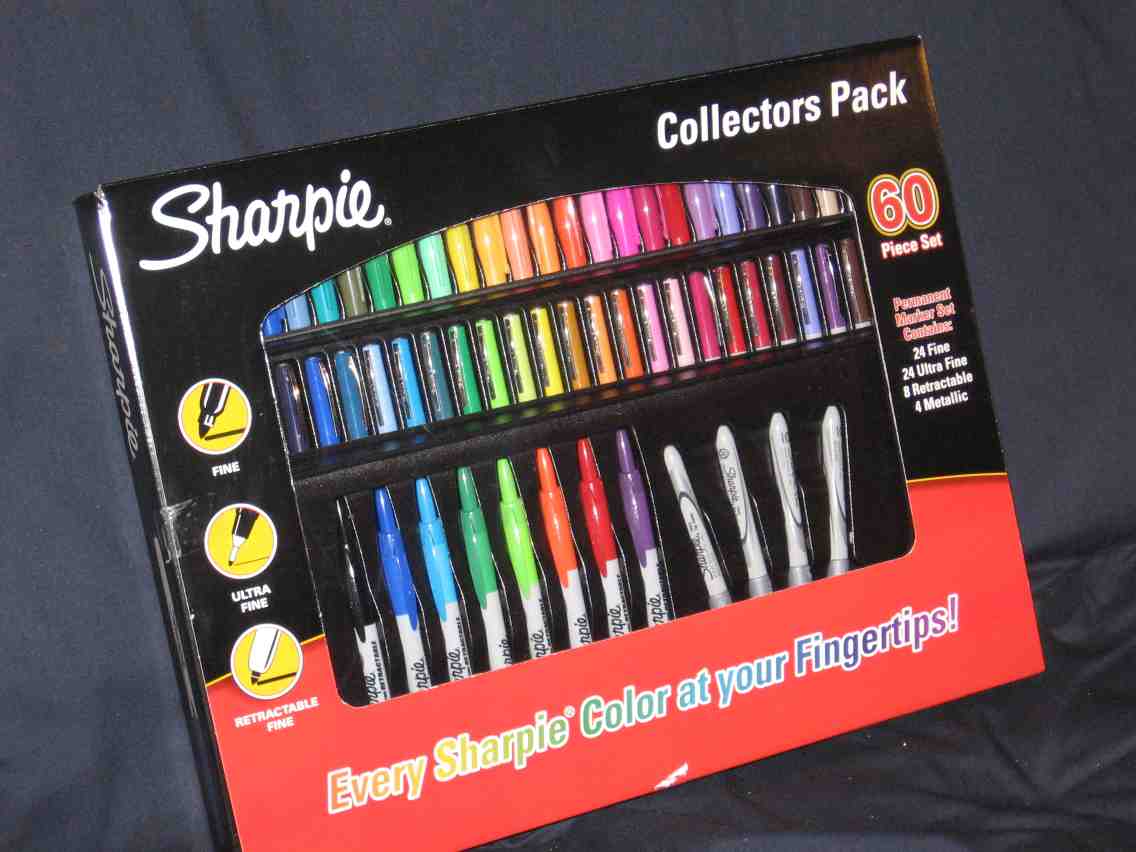
Next came the difficult task of finding pens. I've purchased my fair share of scrapbooking pens over the years, and I was afraid that using that type of pen would bleed all over the glossy finish of the pages. My goal was to hunt down maroon and pink Sharpies, but as I was searching, I kept finding the colors I wanted in the big packs, but not individual Sharpies! I was discouraged.

(source) 
Yeahhhhh ... not going to buy a whole box for two colors.

We shoulda known the first place to go is always Michaels. I found individual Sharpies there. In both colors. That place is magic.

The last step in setting up our guestbook table was to put together some instructions. (Not going to lie, I'm a little afraid that people will just sign the inside covers or something, not realizing that the insides are meant to be written on!) I got this frame at Michaels too, and put some pink ribbon over some maroon construction paper (leftover from our paper airplanes!), and put some directions on top of that:


Voila! Guestbook table DUNZO. Maybe. We might add a framed picture or two later (from bridal portraits?) or maybe some other element.

Have you found any cool ways to use your engagement photos?

Thursday, August 19, 2010

Pilfering and Plundering: A Tutorial

I found out a month or so into wedding planning that Mom Hyena had not discussed my budget (which I had been planning things off of) with H-Dad. We're not the best at communicating with each other.

H-Dad just about had a heart attack when Mom Hyena told him what we had discussed. He asks me on a weekly basis why Mr. H and I don't just elope, only semi-joking. In my frenzy to cut down certain budget lines to a reasonable price, I came up with a brilliant idea.

Mom Hyena is an elementary school teacher. There is a LOT of craft stuff around her house. So one afternoon while I was in town, they headed off to H-Dad's favorite store (CostCo), and I went all How The Grinch Stole Christmas on the house, looking for good craft stuff I could steal borrow.


She took the rare Who pudding; she took the Roast Beast!

I surfaced with a couple colors of ribbon, elastic, lace, twine, two colors of gingham fabric (which didn't match once we decided on a color scheme) and a hot glue gun. Unfortunately most art supplies owned by teachers are not of the wedding-friendly variety, but I'll take what I can get. Besides, that blue ribbon you see there makes an appearance on my "something blue" ...

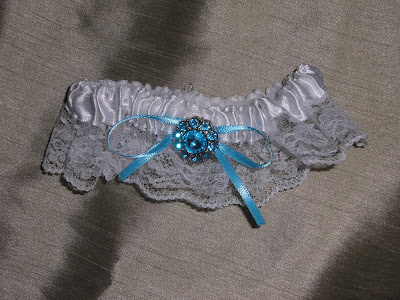
I bought a white garter at Hobby Lobby for $1.99 on a 50% off clearance, but I couldn't just leave well enough alone.  It originally had little plastic hearts and a white bow hot-glued to the front, but I peeled those off. I made a bow out of the blue ribbon from the 'rents and stitched it to the front, and I went to JoAnn's and purchased some bright blue giant rhinestone buttons for about $5. I am not a very neat stitcher, but I doubt any of the boys will be looking that closely if they catch it. Garter complete for under $8! Check!

After I took this picture I realized the bow ends were uneven, so I did trim those. Just didn't want to upload any more pics! (All photos personal.)

Is your parents' house a treasure trove of wedding goodness just waiting to be used?

Saturday, August 14, 2010

Airplanes: Part 1

It's difficult marrying an Aggie. :-P Not because I'm not one, but because you would think in a town full of them, it would be so easy to find anything you want in maroon. And um, you would be mistaken.

In an effort to be "different," I decided we needed to use paper airplanes for our send-off instead of rose petals or rice or bubbles. Bonus: Mr. Hyena is studying aerospace engineering, and totally loves airplanes. Score. I wanted them to be maroon, since pretty much everything else I've planned so far has been pink!

Mr. H could probably tell you what kind of plane this is. I cannot. (source)

We went to every craft store looking for maroon paper. And it is impossible to find. Well, I take that back - they have maroon paper, sure, but it's either too thick or too thin to fold, and I wanted something in between.

Flash forward two days. I spent half a bajillion hours searching for maroon origami paper to no avail. I found plenty of variety packs including the right color, but no plain maroon or burgundy! (I had to expand my color scope for more options. Also to no avail.) I finally decided to buy some sulphite construction paper that can be folded without cracking. (I recently found the same paper on Amazon.com for half the price I paid on another Web site, so lesson learned, always look on Amazon!) Now that it's here, I like the color and texture of the paper. It's not reminiscent of grade school, which is a plus. It folded nicely too! And ... I'll stop here for some suspense! Coming up, I'll show you how they turned out and give a quick tutorial.

What are you using for your send-off?

Sunday, July 11, 2010

DIY Fails and Successes

I have realized that my true calling is to not be a florist. I was attempting to put together my bouquet, and failing miserably. Hyena Sis asked how it could be that hard, when I did the bridesmaids' bouquets and they looked so good.

Well, I have a deep, dark secret...

As I have mentioned, we decided to go the artificial route for our flowers. I found these flowers at a little tchotchke store next door to our venue. Mom Hyena was in town and she noticed them first. I fell in love with the beautiful ranunculus (the white-ish ones are actually a very pale green). So cute!


But these were totally pre-made. The stems were already stuck together in a "bouquet." The only thing I did to these is wrap the glued-together-looking stems in ribbon and stick the pearls on the front. Those aren't even round pearls. They're sticker half-pearls that I also didn't have to line up because they were all in one strand. It was the easiest/laziest DIY project ever, and also probably one of my most successful.

My bouquet is a little more ... challenging. Individual stems of flowers and I do not get along. After about 10 minutes of struggling, I had to ask for help from Mom Hyena, and she put the whole thing together while I watched and made suggestions. *FAIL* All the credit goes to her. She did a wonderful job, and I'm super excited about it.

If nothing else, at least my kitty-boo "helped" me "put together" the bridesmaid bouquets - this was the bag they came in, which took her about half a second to crawl inside. Awww.

(all photos personal)


What was your "laziest" (or easiest!) DIY project?